|
| |
Painting and Ballasting the Track

|
I need to build up the hill/mountainside east of Scranton in the Nay Aug Tunnel area.
To get to the point where I can glue this all together, I need to prepare the track.
The first job was to paint the track. I have this nifty tool called the
Rusty Rails Painter from
Joe's Model Trains.
|

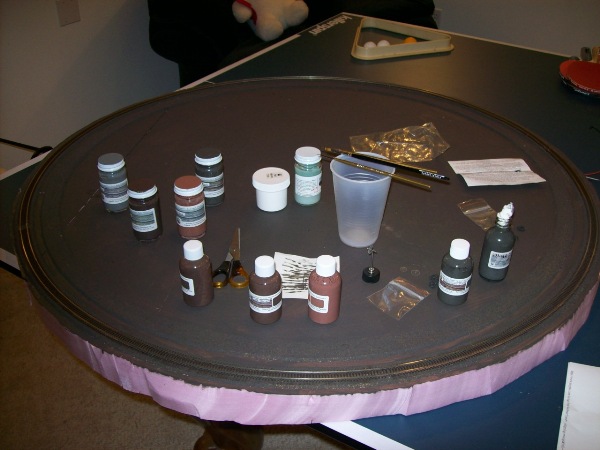
I bought special paint in weathered black, dark brown, brown rust and shale from Joe's for
use in the painter.
|
This is what the website has to say:
Our custom formulated flat acrylic paints are specially formulated to work best in the Rusty Rails Painter tool!!
Nickel silver track has very smooth metal. Getting good coverage without shiny metal showing through or avoiding
streaks is an issue. Brushing or spraying paint on the rails is difficult and tedious.
We begin by a using high quality flat acrylic base. Special additives are added to thin,
improve smooth flow, and improve adhesion.
|
|
In preparation for doing the track painting, and later, the ballasting,
I decided it was time that I built a test track.
Here it is. It's a piece of foam on which I have laid two circles
of cork roadbed and, at this time, one circle of code 55 flex track.
The outer circle has a radius of 18" at track center and the inner one is 16.5".
The idea is that, as well as using the test track to run in locomotives, I can use it to do
experimentation of techniques that will be later applied to the real layout.
There's also an assortment of the rusty rails paints and the painter itself just
right of center in the foreground.
|

|
The Rusty Rail Painter comes with some plastic disks and some foam disks. For code 55 N Scale track, you use
only the plastic disk. Here you can see me applying some weathered black to the branch line. You simply roll the
disk along the side of the track (here I am doing the outside). The paint drops with gravity down the hollow
shaft and out of a small hole near the edge of the disc. The turning disk moves the paint from there to the
rail. Once you get the hang of it, you can move along quite fast. Certainly this is easier and faster than
with a brush. And you do not need to mask anything either.
The vertical line on the foam is where a tunnel portal will ultimately be placed.
|
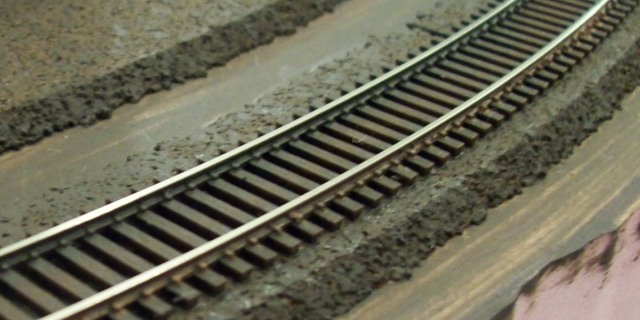
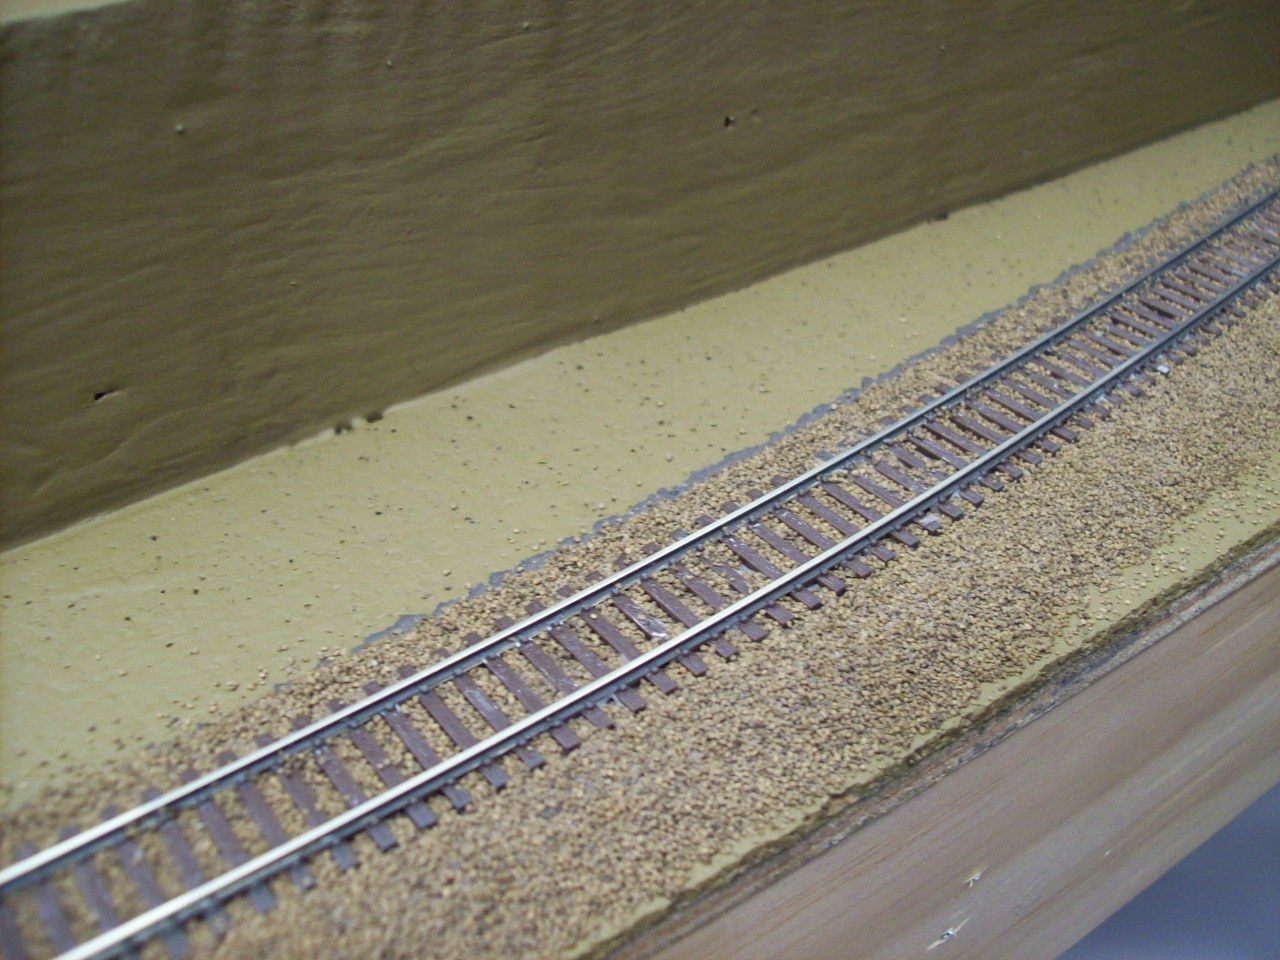
I started off by painting the track either weathered black or dark brown
(there's really not a lot of difference between the dark brown and the weathered black).
This means four sides: the inside and outside of each rail. This adds up to a lot of painting!
I then run the brown rust along to create the rust look that I was hoping for.
The reason for the pre-painting in black or dark brown is because I do not
necessarily want the rust to
cover the whole of the rail and certainly did not want the shiny silver of the rail to be seen, So the
priming color hides all of that, and acts as a primer, making the application of the brown rust pretty easy.
The track shown at the right has both rails painted with weathered black. The outside (right) rail
then was painted with the brown rust.
This looks miles better than the shiny nickel rail. It also makes the rail look smaller, both in
height as well as width, perhaps because the only shiny part is the top of the rail and the sides
blend in with the ties more. You can also see that the track nails stand out better than when the
rails are not painted.
|
Ballasting Technique
Boy, oh boy! There are 100 ways of doing this if you talk to 100 different people.
I've only done ballasting once before. Well, if you call it that. I piled on the ballast and then
dumped on the Woodland Scenics' scenic cement with a spray. What a disaster. It ruined the track that
I had laid. Too much ballast, too much ballast in places it should not be (such as the inside of the rails
and everywhere in the turnouts). So I never did any ballasting on the
Gulf Summit & Susquehanna Valley Railroad
as I was scared of ruining that too!
So here is what I did (having never done any ballasting before):
|
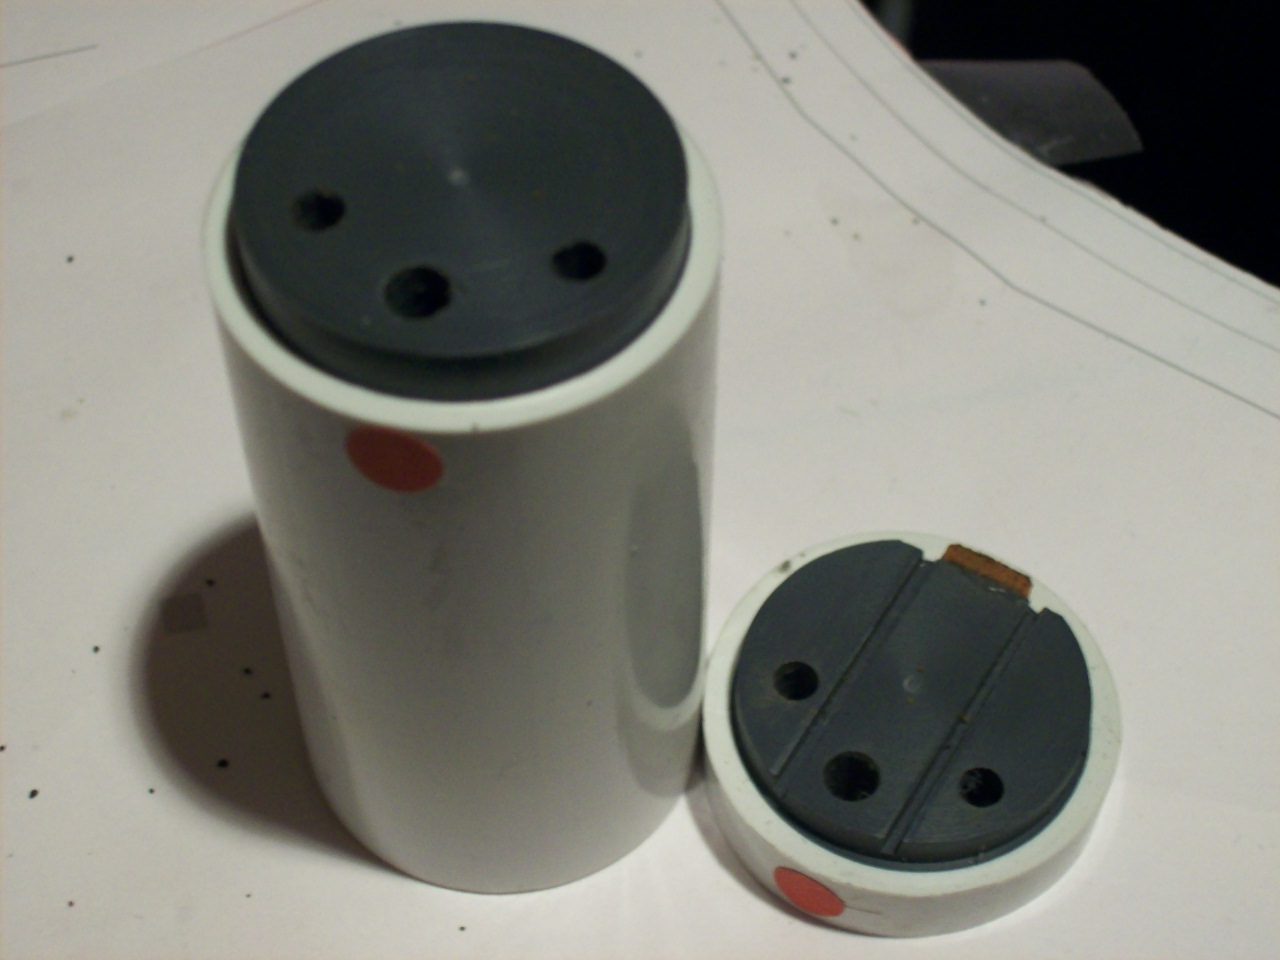
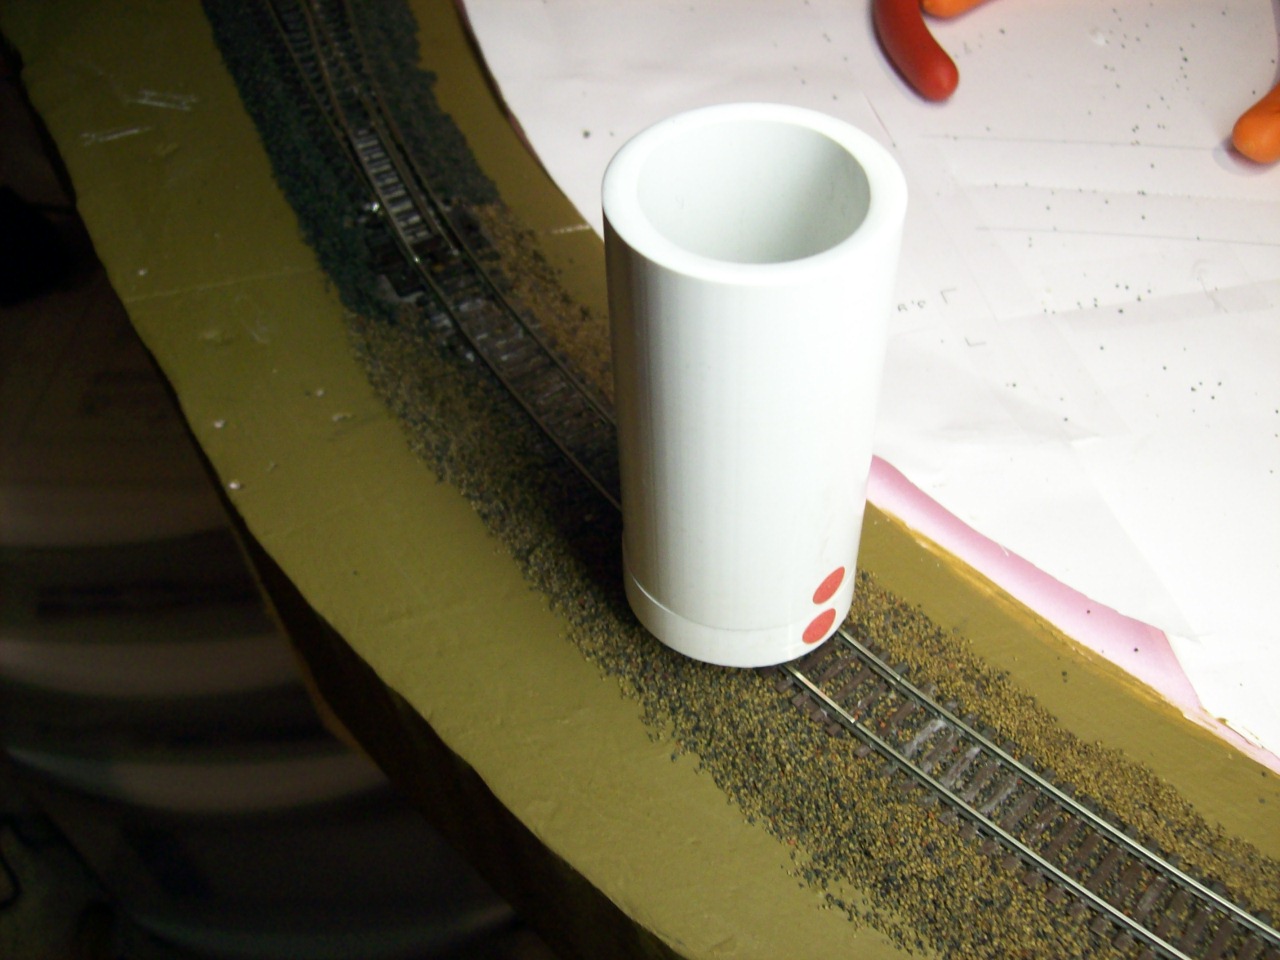
A number of years ago, I picked up this ballasting tool. This is the view of the two pieces viewed from
the bottom. You can see each has 3 holes; one for between the tracks and one for each shoulder. The small piece fits onto the
larger piece as seem in the next photo.
|
|
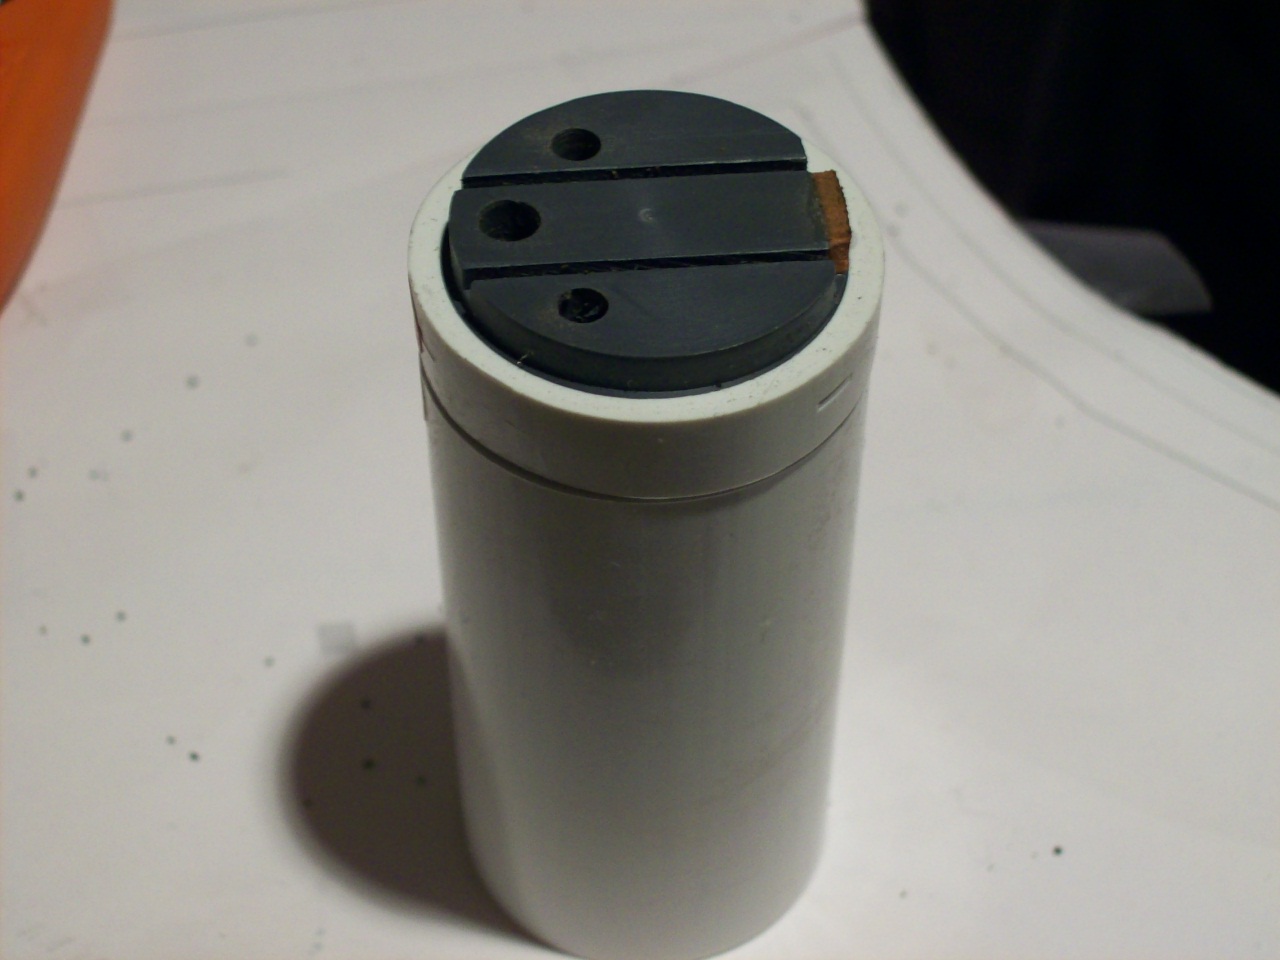
Here the gadget is assembled, but still upside down. The red dots (see the prior photo) are aligned on the left side. There are
tracks for the rails and, on the right side, a ballast flattener in between the rails.
|
|
It is now in place on the rails (ok, these are already ballasted, but you get the idea). The dots
are aligned on the right which means all three internal holes between the two parts are now aligned and the ballast can come out.
Since the dots are aligned on the right, the gadget would be gently moved to the right. It would then
leave an appropriate amount of ballast between the rails and on each shoulder.
Next, I deal with any extra ballast between the rails, rubbing my finger down the middle, then using a
small brush to brush it off the inside of the rails. Then I run my finger gently over the outside edge of the
ties to distribute any excess ballast to the outside.
|
|
Now wet the ballast (I am using Woodland Scenic's fine-sized ballast) with isopropanol
(isopropyl alcohol), the 70% version from the drug store. I use a small pipette - an eye dropper - to
do this. Once run down the center between the rails for 2 or 3 feet and then down each shoulder.
Next I glue it. I use a mixture of the isopropanol, water and matte medium, mixed 1/3 each.
Same technique as I used for the isopropanol. Then leave it to dry for a few hours, or overnight.
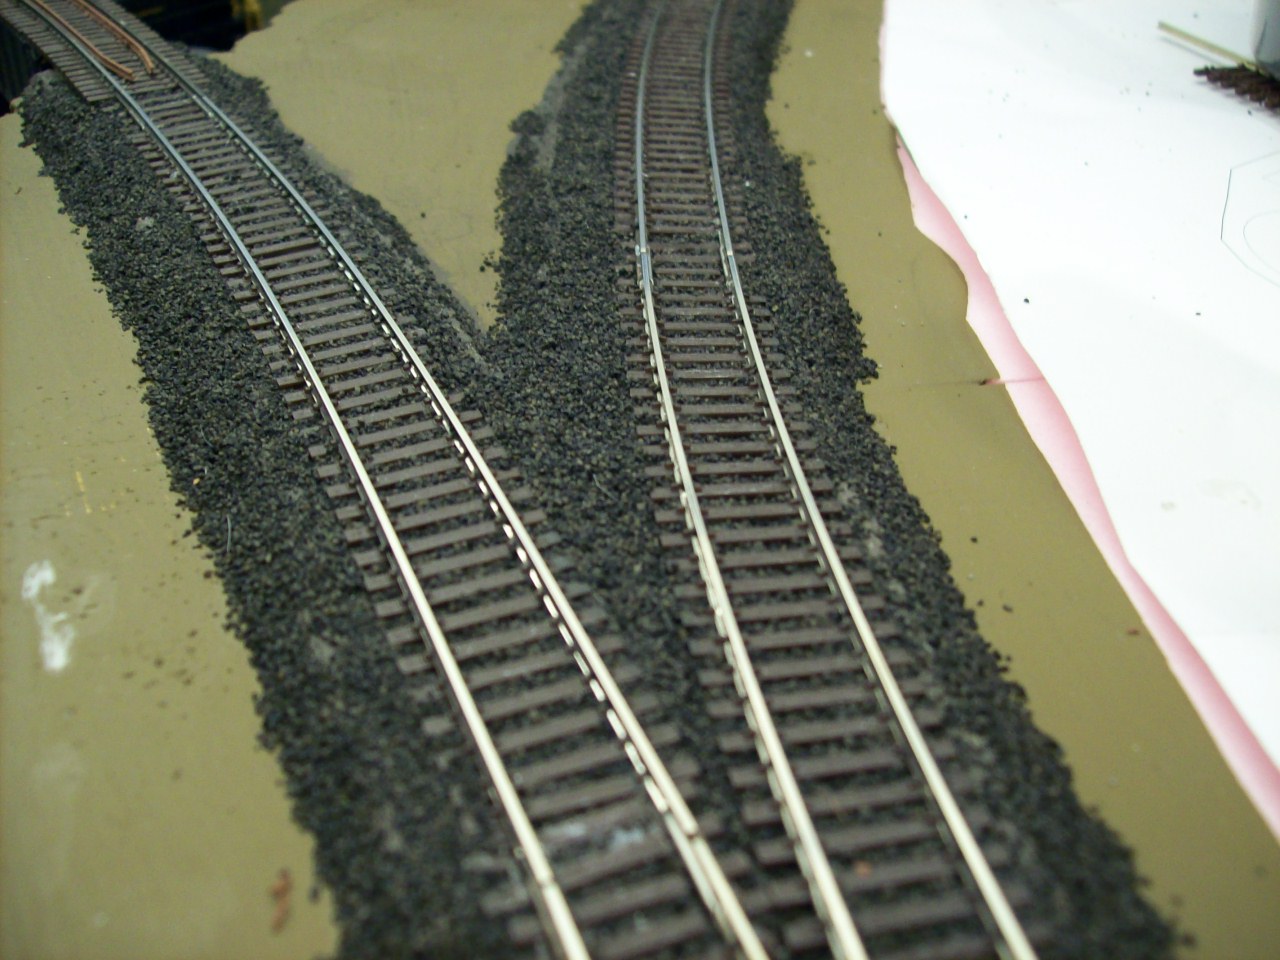
This is the result on the Bloomsburg Branch. This is WS fine dark brown ballast.
|
|
I used WS fine cinders ballast for the Hyde Park Wye, as well as tracks over Bridge 60. The plan will be to
use this all over the yard and engine facility. I had planned
grays of varying shades, but I think this
looks really good and, perhaps most important, matches the look of the
prototype.
|
|
This is the look on Bridge 60. Again, I used WS fine cinders
which gives a good representation of the
prototype.
I also put a bit of WS fine dark brown ballast topped with small
amounts WS fine turf between the westbound main and the razzle
track (a.k.a. the D&H interchange).
I think it looks pretty good for a first time ballaster!
|
|
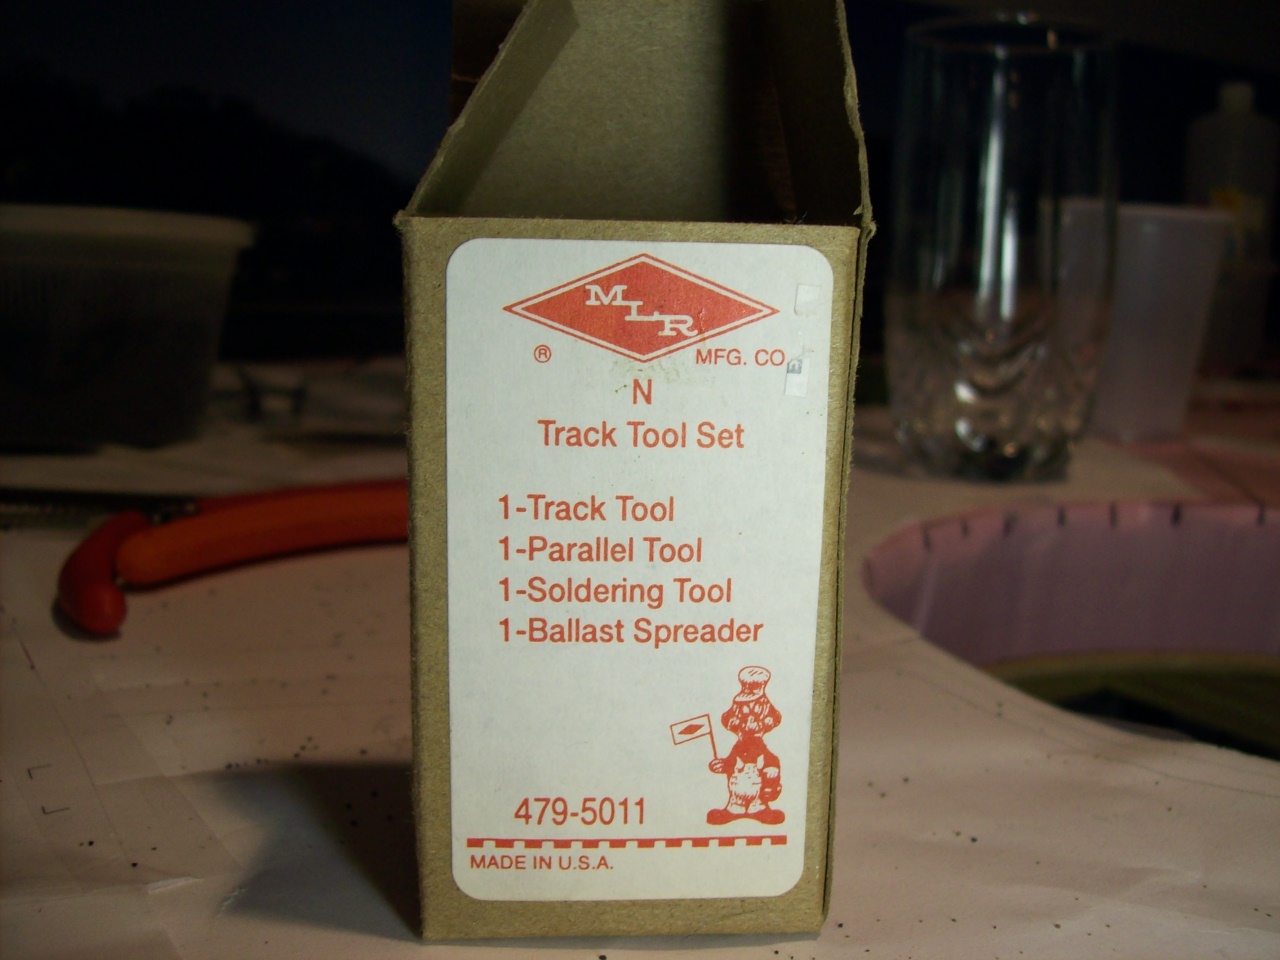
I found the box that the spreader came in. I got the set from a
train show sometime and I see
MLR MFG CO has a website. There are more details of these
tools there. And, I also see that I have their flex-track
alignment tool too. That one is also very useful.
I did use the parallel tool for track spacing (and I already had
one of them), but have not used the track tool (for cutting
flex-track) nor the soldering tool.
|
|