 |
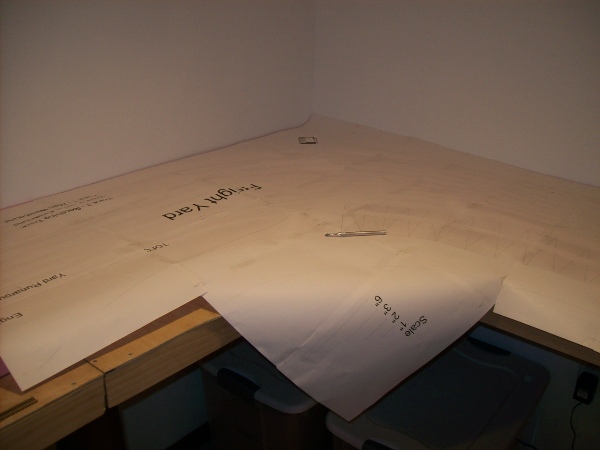
I printed out, on legal size paper, the track plan for section C.
I picked this because it had about the simplest plan.
Section A has less track but it also includes more switches plus a tunnel and down grade.
I joined the pieces with tape (each sheet has a registration mark to align it with the next)
after removing the left and top side of each piece at the registration mark.
|
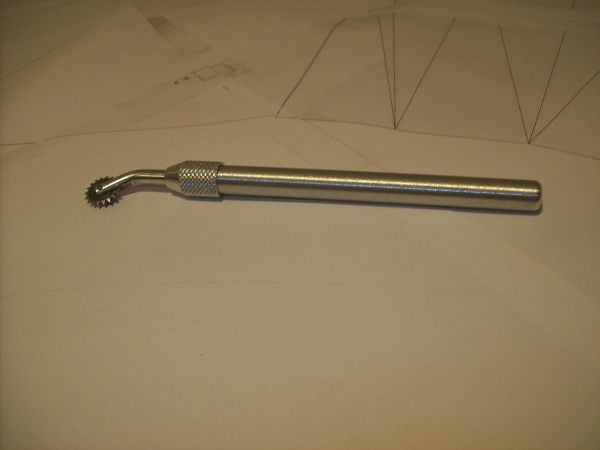 |
I then traced over the track lines with a pin-wheel. This leaves a
trace in the foam which I then ran over with a permanent marker. |
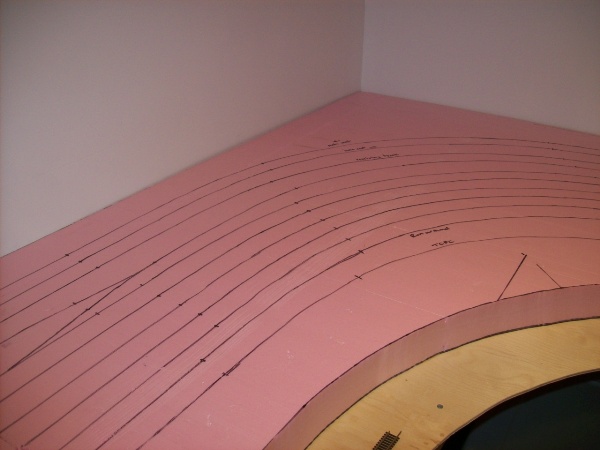 |
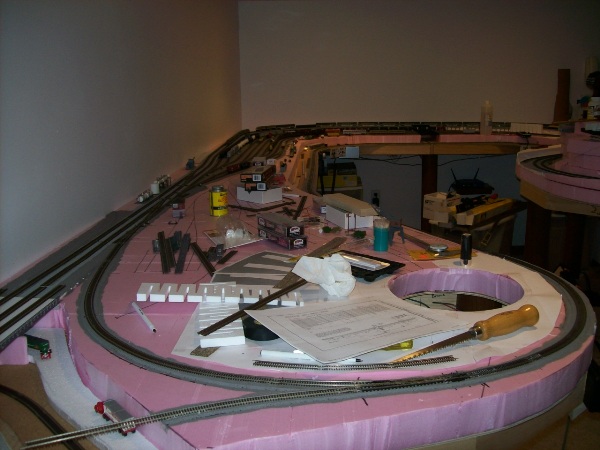
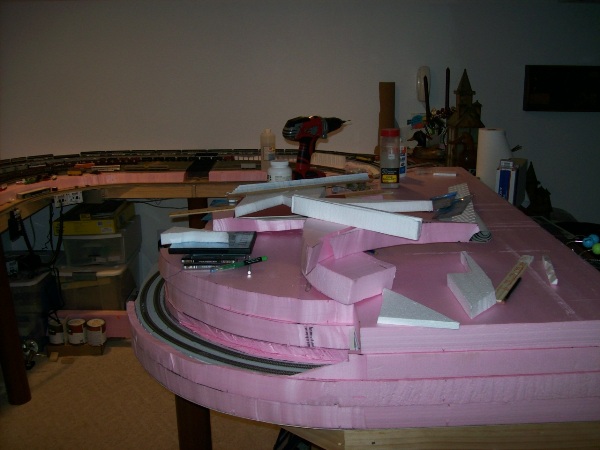
Here you can see the completed section C. The main line is the two
tracks on the left. They will be elevated by 1/2". Additionally, I did
not mark the track on the lower level because that one doesn't really
need it. I will have a service road on the inside next to that track. |
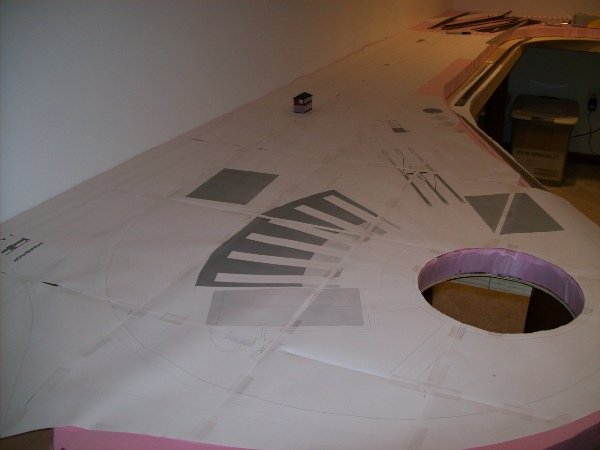 |
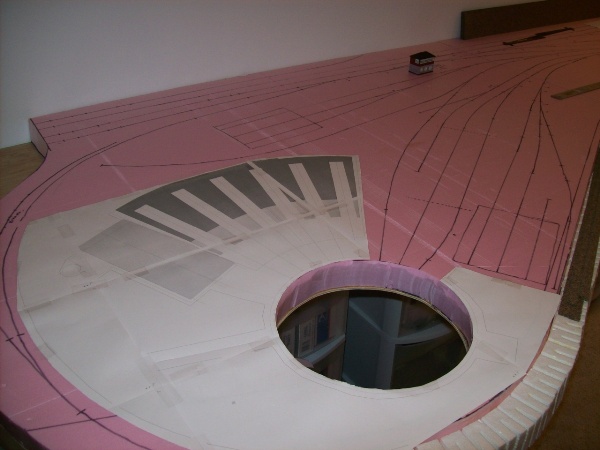
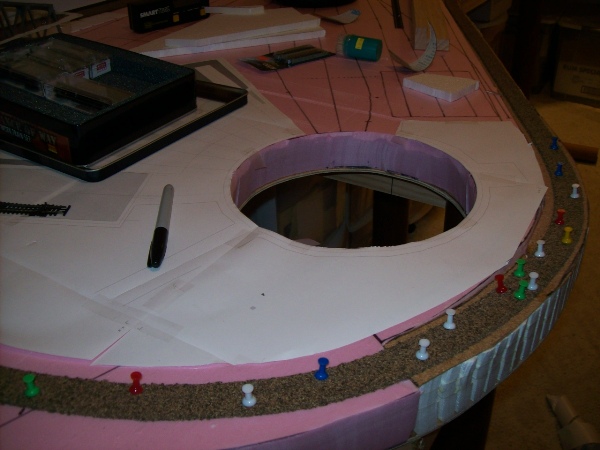
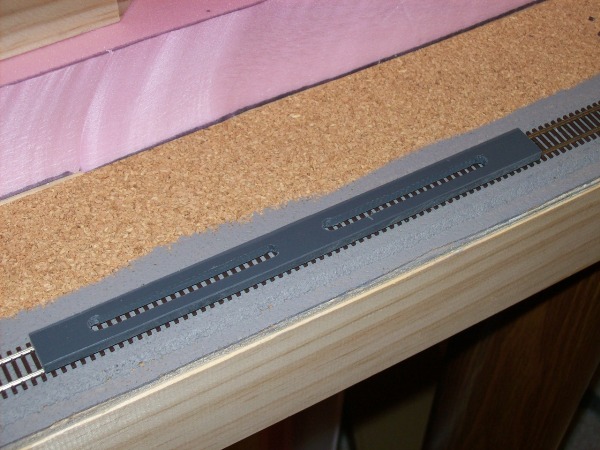
This shows the stencil for the engine facility laid out on sections
D and E. Here, I found that I had cut the hole for the turntable 1"
too far east. That is, the hole should have been 1" towards the camera.
The result of this is that the wrecker track is pinched by the
Bloomsburg branch that descends to the lower level. |
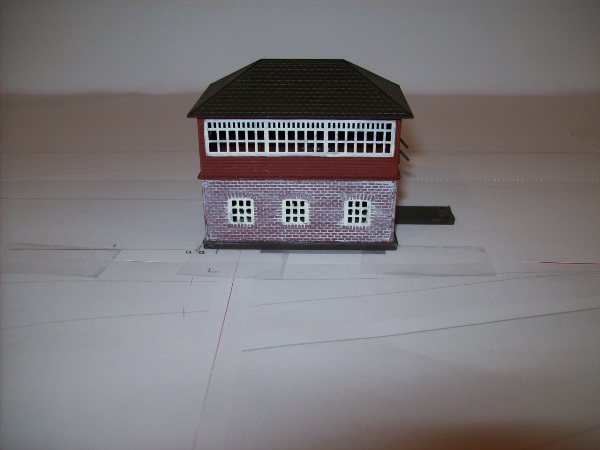 |
Bridge 60 Tower in position |
 |
I've marked all of the track. For the time being, I'm leaving the
stencil over the roundhouse and surrounding area. |
 |
The mainline rises up above the base by 1" in many areas. The grade
is always 2 percent because I have used Woodland Scenics' inclines
throughout. The double-track main is the track on the outside, the
return track to the lower level on the level.
I originally planned just 1/2" rise for the main, but decided that 1"
would work better. This meant adding a 1/2" to the grade on the left. |
 |
On the eastern approach to Scranton, the double track main is on the
right and the yard lead on the left. This is all Peco code 55 track
because I wanted to have a double slip (which I picked up real cheap at
Joe's Hobby). It made the most sense to use Peco turnouts to complete
the area.
The board is Woodland Scenics 1/2" board cut to size. It comes in an
(expensive) piece sized 24"x12". |
 |
Between sections B and C, there will be a series of bridges over
Washington Avenue. In the prototype, this street was at the end of the
yard. I need it to be under the east end of the yard. |
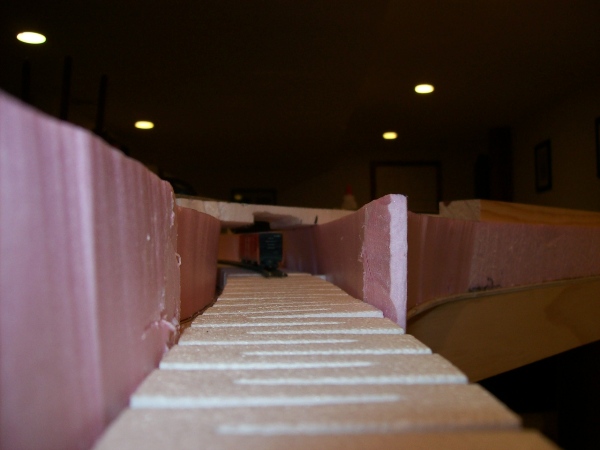 |
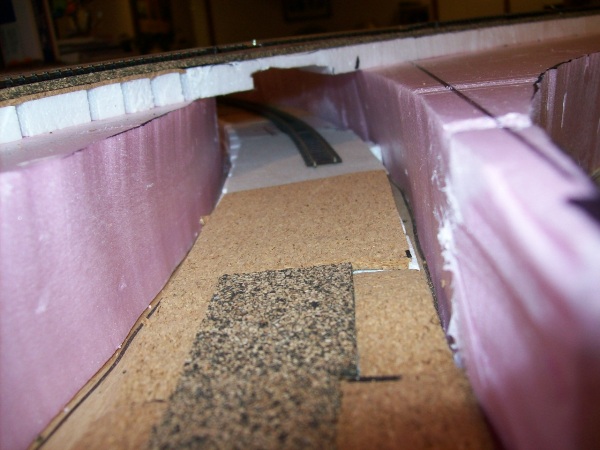
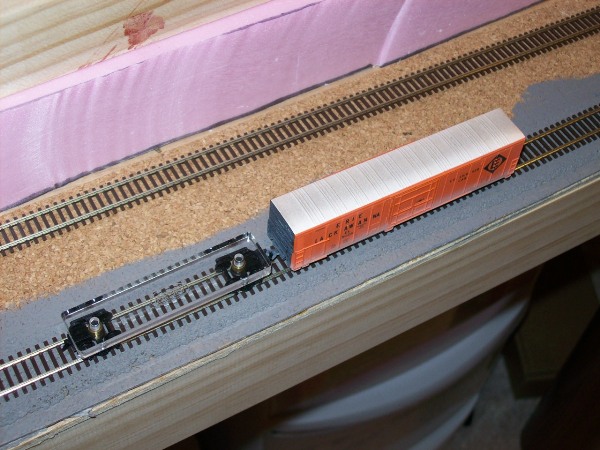
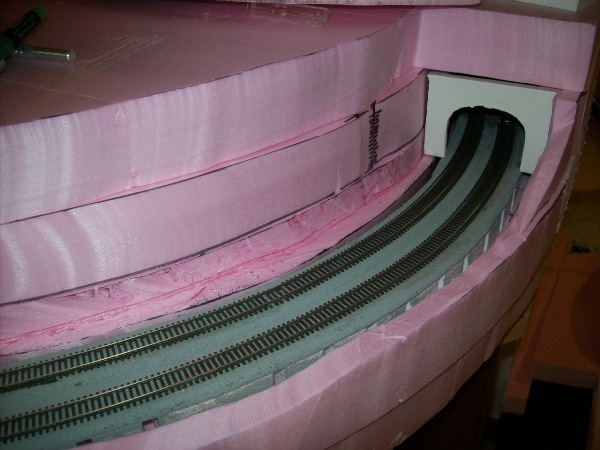
Is there enough clearance for the tunnel under the upper level? I
used the hotwire cutter to notch the upper level's base. There's plenty
of room here for this 60' boxcar. However, it will be tighter with a
layer of cork roadbed underneath. Nevertheless, there is room. |
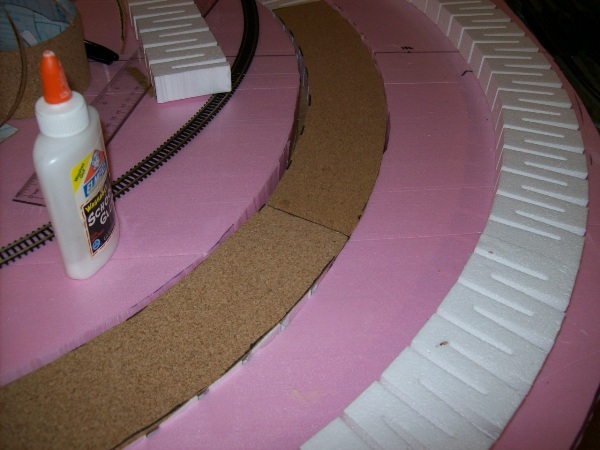 |
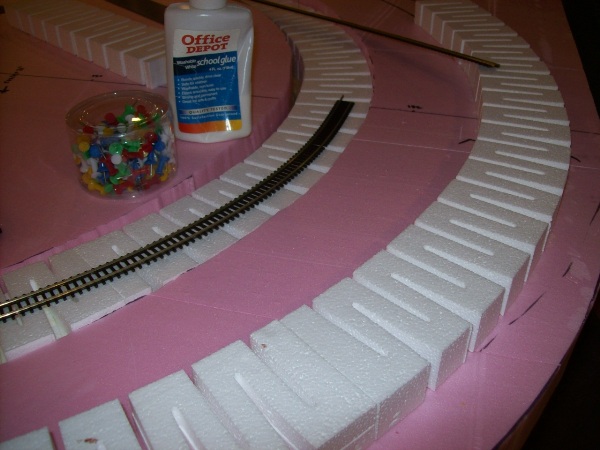
I decided to lay cork over the risers and inclines. So I bought self
adhesive cork rolls and cut pieces to size. Fortunately, overnight it
pealed off the foam. I say fortunately, because I then glued it down
with white glue. If it had taken a while, then I would have been in a
far worse situation. From now on, white glue for everything! |
 |
Here the cork roadbed is laid under the upper level. Still enough
clearance. |
 |
The Bloomsburg line descends to the lower level. The roadbed is in
place. |
 |
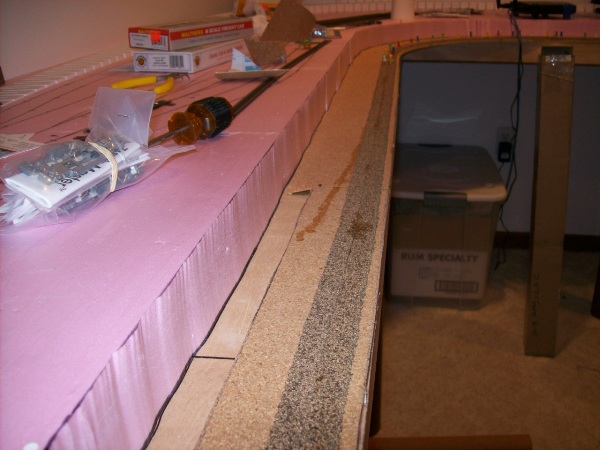
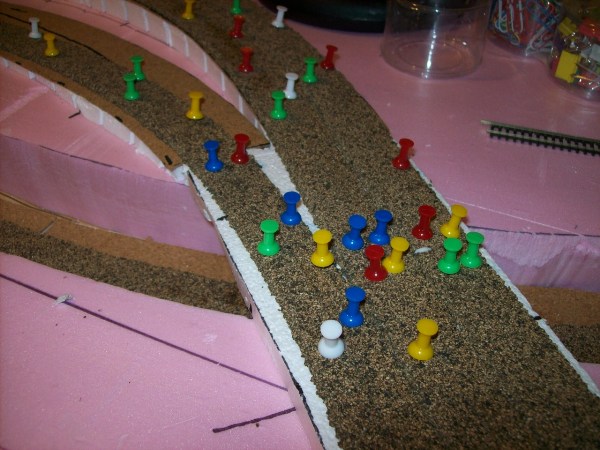
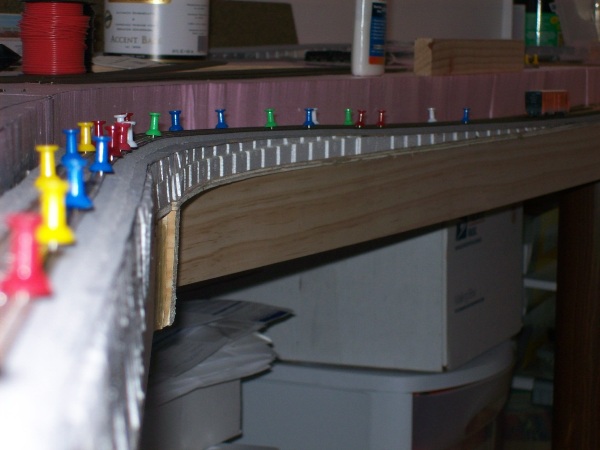
I glued the roadbed down using white glue and push-pins. The glue
takes just a couple of hours to be set and I have a couple of hundred
push-pins. This is the way to go versus nailing the roadbed down like
I did on the Gulf Summit
& Susquehanna Valley Railroad. First, it creates a much more
consistent surface and, perhaps most importantly, is way faster. |
 |
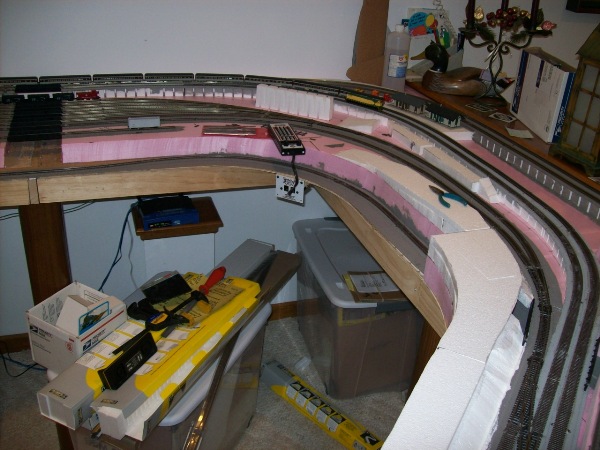
The double-track main around Dunsmore is clearly visiable, along
with the yard lead and the (fictional) return track to the lower level. |
 |
The yard descends to the level of the foam, while the main ascends
to the Scranton Station. I reality, there is no ascent here, but this
allows me to get better separation of main and yard which is more
prototypical here. |
 |
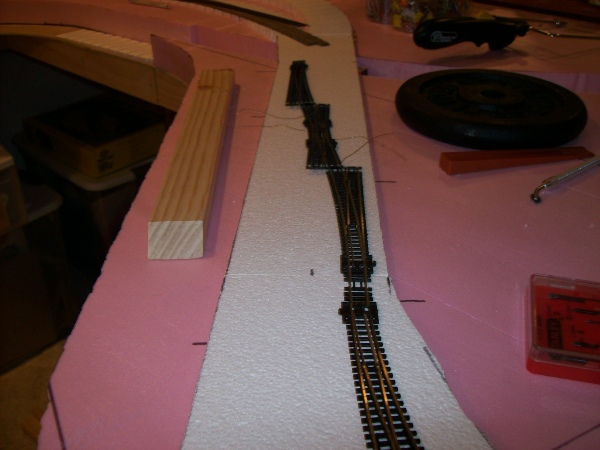
The double track main can be seen here heading off into the
distance, where it grade-separates from the yard. The receiving
track/yard lead has its roadbed laid completely. In the foreground, the
start of the Hyde Park wye can be seen. For the keen observer, you
will see that I missed the track mark where the wye leaves the yard
lead. Not so grasshopper. I decided to replace the #7 turnout with a
#10, also replacing the crossover from the eastbound main (center track)
and yard lead with #10 turnouts.
The camera fore-shortens the perspective here. The roadbed on the
main that you can see here is 9' long and the total view is 15' |
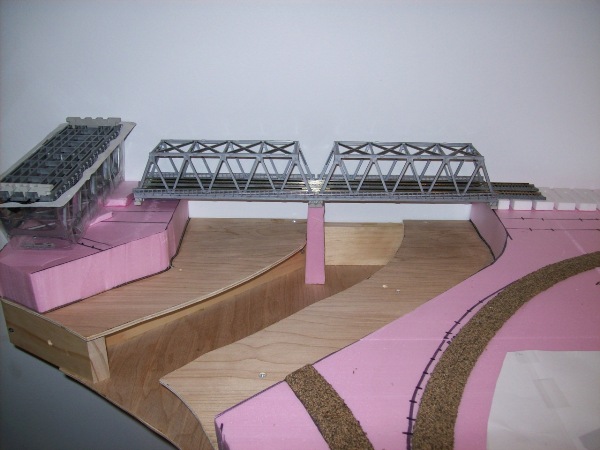 |
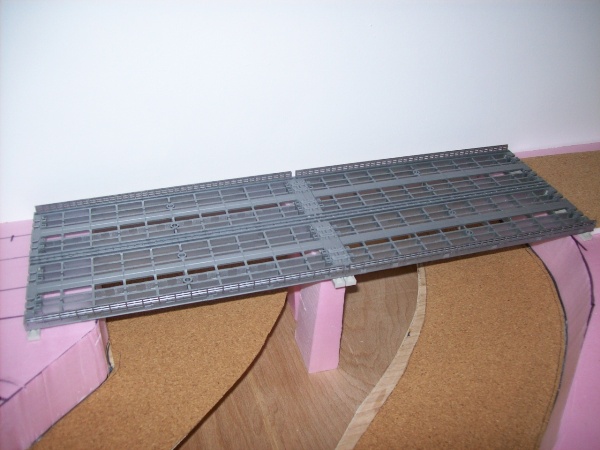
This is the Bridge 60 area. These are Kato double track truss
bridges, each 9.75" long. I will be removing the trusses and making them
look more like plate girder bridges. There will be 4 lines over here,
with a 2x2 array of the bridges. On the lower level, the CNJ ran on
the left (west bank). I will either have no track or an abandoned line
here. On the other bank, there will be the D&H line and a road. |
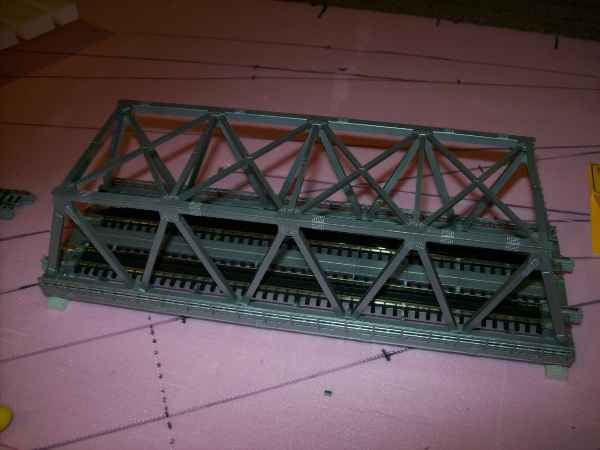 |
A side digression is to start the scratch-building of Bridge 60.
Here is a Kato double tracked truss bridge. It is 9.75" long and 6"
wide. They come in various colors. This is grey and is Kato p/n 20-437.
I bought four of them. |
 |
I set them in a 2x2 array, stripped of the trusses, the inside
railings, the Kato Unitrack and the end track connectors. This leaves
a basic deck.
I will be gluing a piece of 0.01" styrene (6" x 19.5") onto it, then
laying over roadbed. More on that later. |
 |
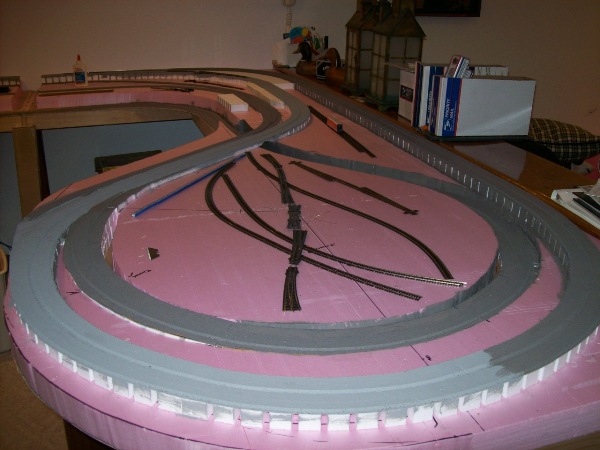
I've got the roadbed for the main as well as the Bloomsburg branch
line laid. This forms a loop of about 56', though I've laid about 100'
in total so far. |
 |
I did have roadbed where the lower level starts to climb up to
rejoin the upper level. However, I decided that the clearance of 1.6",
although ample for what I currently had was too low. I have an NTRAK
template for clearance. It has a 23' height which is 1.75" give or take.
I now have that clearance. |
 |
While this was going on, I posted a question about ballast colors on
the main, branches and yards. One reply was to ask what it looked like
in photos. Duh! So I looked. I decided that, in general, the main was a
fresh ballast of light grey, the Bloom was similar but the yard was a
deep blackish color due to oil and cinder collection over the years.
Next, I looked through my accumulation of landscape supplies and found I
had fine light grey ballast from Woodland Scenics as well as fine
cinders (black). I had a couple of others which I may mix in a bit.
The plan is to have light grey for the main, a darker shade of grey
for the branch and the freight yard and dark cinders for the engine
facility.
I went off to Home Depot and color matched the ballast and returned
with 3 different colors. In this shot you can see the main and the
branch colors. The main is darker on the right because it will be going
into a tunnel there.
At this point, the main, the return loop and the Bloom are painted. |
 |
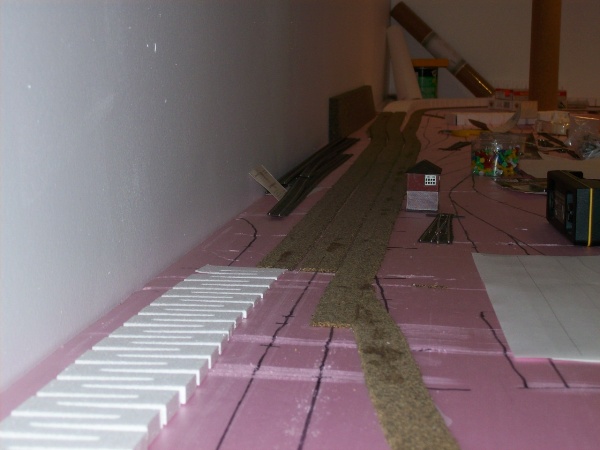
This is the first piece of track laid. I've glued it down with white
glue. At the far end is a 3" sectional piece off track which will be my
standard piece for going across the joints between benchwork sections. |
 |
The down grade of the Bloomsburg branch line with a Erie Lackawanna
box car in the distance. This is a 2% grade and is not as steep as it
looks here, where the telephone lens is fore-shortening the distance.
It is sure better using these construction techniques (foam, roadbed
and flex-track all glued down) that those employed in the GS & SV
Railroad (plywood cookie-cutter, nailed roadbed, nailed sectional
track).
The resulting track profile is much smoother as well. |
 |
I'm also using a track inspection car from Aztec (of decoder frame
fame) which will be used for track inspections as I lay track. This is
transparent and comes equipped with Micro-Trains trucks. I need to
change the wheel-sets for MT low-profile ones because of the notorious
"MT cookie-cutter wheel profile running on Atlas code 55 track" problem. |
|
Another tool I have is this flex-track alignment tool. I think it is
a Micro-Trains product. It is about 8" long and has two grooves in the
lower surface into which the rails fit. This helps get a straight
profile from the flex-track.
|
|
|
At this point we ran our first train on the layout. Check it out here
|

|
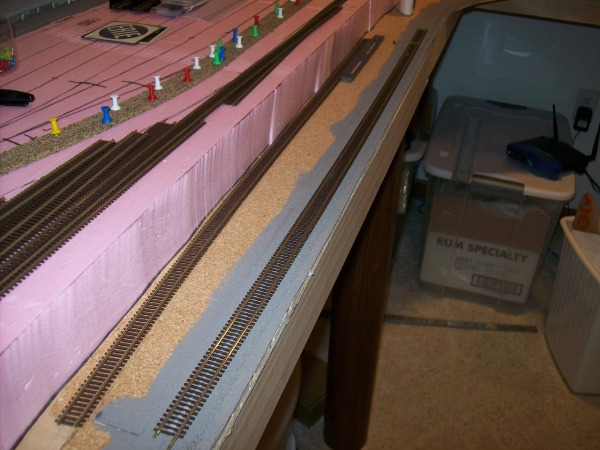
Well, photos of track can get pretty boring. Cutting to the chase,
this is the first photo after a complete loop has been laid. It is as
follows:
The Bloom branch line joins track 3 (the receiving track in
the foreground where the tank car is). From there, you cross over to
track 2 (the east-bound main) on its left. Continuing eastbound, past
the Scranton Station to the double slip, where you cross over to track
#1 (the westbound main) and then diverge onto the branch line which goes
into a tunnel and emerges as the Bloom branch line.
Of course, at this time, the station and the tunnels do not yet exist.
You can also see in this photo that good progress has been made on the yard tracks too.
|
|
|
|
|
|
|
|
|
| Well, I'm sure that's enough of that. |